 OK folks, it's day three on my 12 days of Christmas. Today's gift for my kids was phrased like this: On the Third day of Christmas my true friend gave to me...a Three letter hanging to bring JOY for all to see. I really love how these turned out and this was actually my very own idea! I didn't "borrow" this from anyone else's blog. hee hee So, this is what you will need to make this on your own:
 Supplies: Blank cardboard coasters
Christmas themed scrapbook paper
Chipboard letters of J, O, and Y
Embellishments of your choice
Adhesive
X-Acto knife
Ribbon of your choice
Emery board or some other type sanding medium
Ink pad of your choice.
Cropodile
Cropodile
 I got these chipboard coasters online. I just did a search for drink coasters and compared all the prices and bought 100 at the cheapest place I could fine. That ended up being HERE
I got the small square ones. They were $8.00 for 100 of them. Super fast shipping too I might add. So, the first step is to put some adhesive on one side of the coaster and adhere it to the backside of the paper you chose.
 Use your x-acto knife to trim along the edges to cut it out. Then put some adhesive on the other side of it and adhere the other side to the same backside of the paper. Cut it out as well
I'll be honest here...I staged these pictures. I'm not left handed. In fact I'm SO right handed that I couldn't even hold the camera with my left hand to take a picture so I "staged" it in my left hand and then took the picture with my right. But you get the idea! :)

 The next step is to sand down the edges to remove any loose or overlapping paper. I just use a store bought emery board for this. You can buy fancy smancy sanding tools specifically for scrapbooking and paper crafts but these work just as well and cost a fraction of the price. Anyway, sand all the edges. I try to sand a little of the edge to give it a vintagey aged look.
(My husband had to take this picture because I couldn't hold both the coaster and the emery board to show this and take a picture. He's such a trooper! I think I'll keep him!)
 When you are finished sanding, you will have something like this:
 Next, you can skip this next step or do it either way. But, I distress it at this point. All this means is I rub the edges with some ink to give it an aged, distressed look. I use Stampin Up Creamy Caramel ink for this. It gives the perfect aged look in my opinion.
 Make sure you get both sides too. After distressing your piece will look something like this:
 Continue with all of your coasters. You will need at least 3 in different but coordinating papers. You could use the same paper as well but I prefer different papers.
 These are my completed pieces. So, the next step is to align them up in the order you want them. I liked the red on top, the holly print in the middle and the green music print on the bottom.
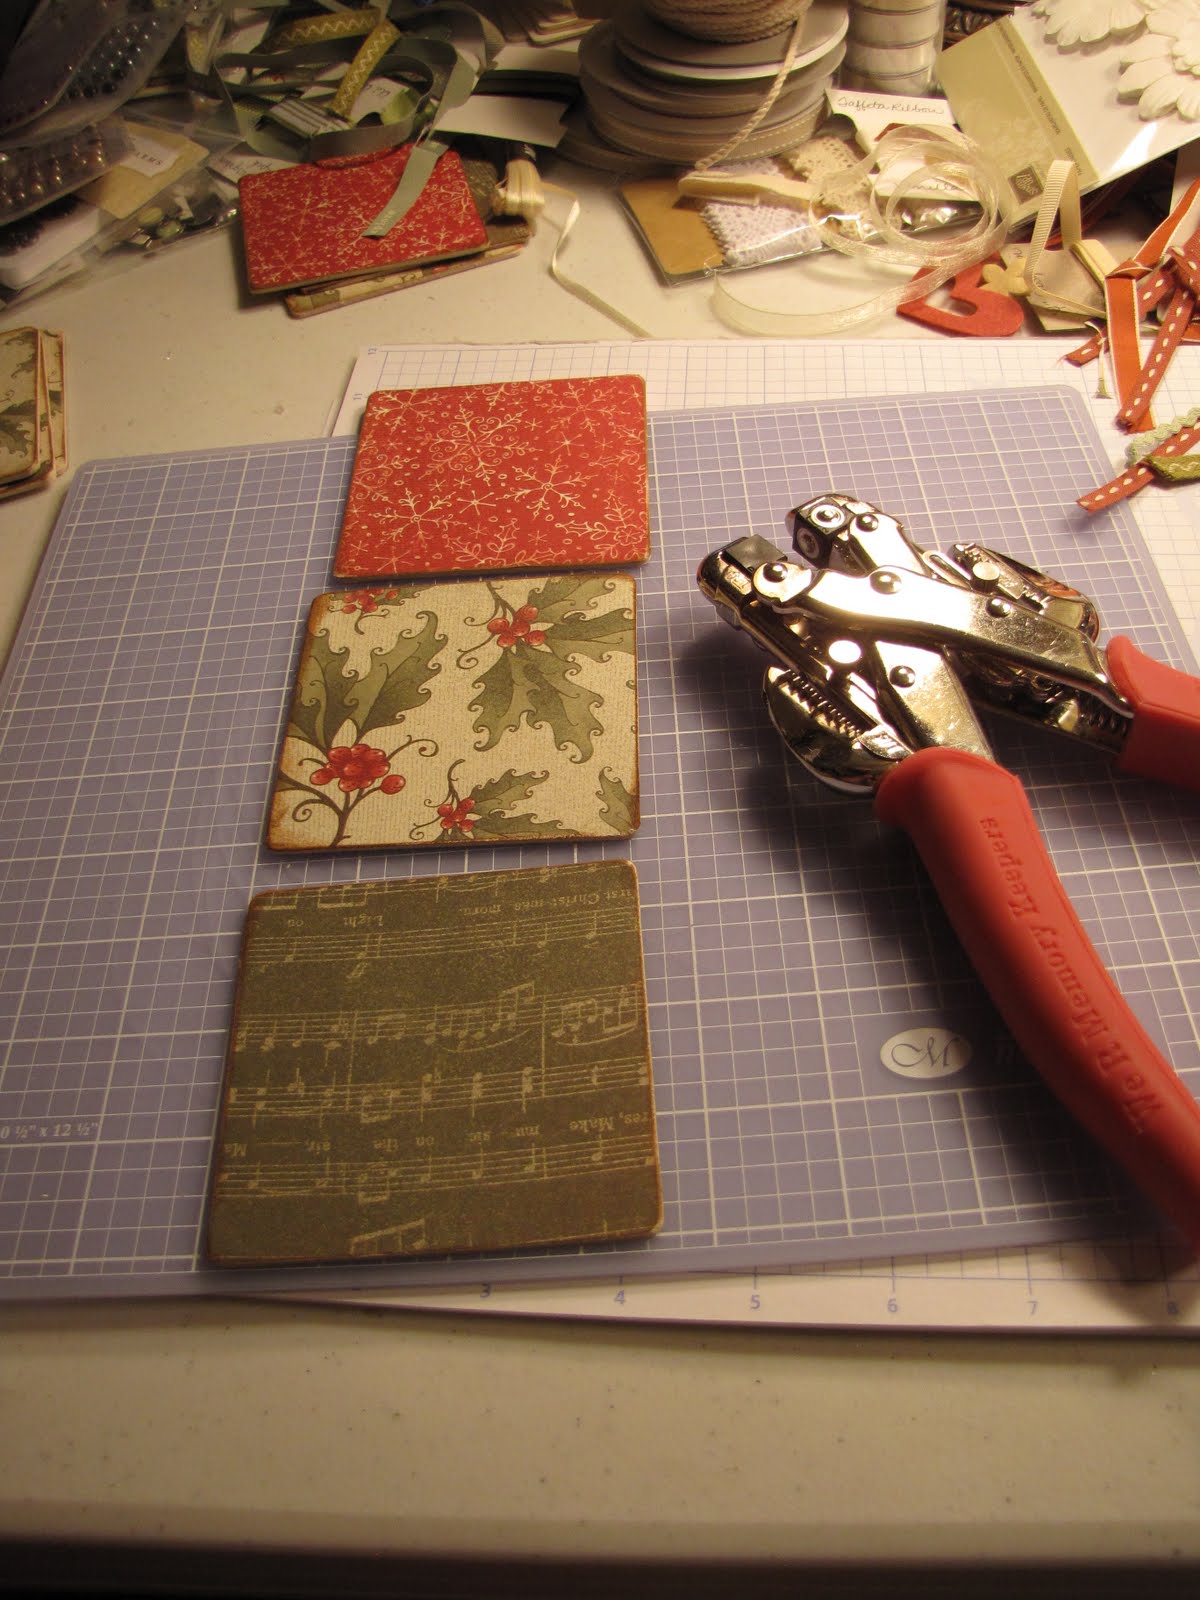 Now, it's time to punch the holes. You really need a Cropodile for this. If you have another method of punching holes through chipboard then do whatever works for you but for me, the cropodile is the tool of choice and man it goes quick and easy with this puppy.
 Adjust the back stop for the larger hole punch on the cropodile so that your holes will be about half an inch to an inch in from the edge. You will need 2 holes on each opposing side of both the red and holly print and only on one side of the green. Like this:
 The next step is to add your letters and embellishments. I found sheets of single letter chipboard from my Close to my Heart dealer. Woo Hoo!!!! No wasted letters. I bought 3 sheets each of J, O, and Y. I picked out the letters at random trying hard to mix up the fonts and not have any matching fonts. The sheets of letters come with all sorts of sizes and fonts. I was able to use all but 1 of each of them. Only one was too big. I also used the negative of some of the letters as well. Just use your adhesive and adhere the letters to each of your pieces in order of course to spell JOY.
 You can use any embellishments you want. I tried to keep it pretty simple with these. First of all I think the papers are so beautiful that I didn't want to cover them up with too many embellishments and like they say "less is more." So, keep it simple but give each piece just a little bling to jazz it up a little.
 Next, it's time to tie it all together. Use ribbon of your choice to tie each of the pieces together and to make a hanging loop at the top. I mixed up the ribbon and just used whatever I had.
I really liked the twine like ribbon I had the best. It was easy to tie as well. For my ribbon I used old scraps of ribbon I had too. I didn't buy anything for this project except for the coasters and the letters. Everything else I already had from my scrapbook hoarding! ha ha ha However, if you do have to buy everything to do this just get 3 different ribbons to match your paper.
 That's it!
 The best part? The back side is covered in pretty paper too. You can put pictures on the back side on each one. If you will be hanging this where it will be seen (like on your Christmas tree) I think it would look really cute to have pictures on the back side.
 A close up of the finished product:


These are so cute, so quick, and so easy! I'm making quite a few. I made 4 of these last night from start to finish in 2 hours. I was talking to my hubby and watching TV while I did it so I'm thinking if you really got down to business you could do it in less time even.
 I mixed things up quite a bit with each one and just played with all of my "stuff" to come up with different embellishing ideas for each one. I didn't want any 2 to be exactly alike.
I really liked the twine like ribbon I had the best. It was easy to tie as well. For my ribbon I used old scraps of ribbon I had too. I didn't buy anything for this project except for the coasters and the letters. Everything else I already had from my scrapbook hoarding! ha ha ha However, if you do have to buy everything to do this just get 3 different ribbons to match your paper.
 That's it!
  The best part? The back side is covered in pretty paper too. You can put pictures on the back side on each one. If you will be hanging this where it will be seen (like on your Christmas tree) I think it would look really cute to have pictures on the back side.
 A close up of the finished product:


These are so cute, so quick, and so easy! I'm making quite a few. I made 4 of these last night from start to finish in 2 hours. I was talking to my hubby and watching TV while I did it so I'm thinking if you really got down to business you could do it in less time even.
 I mixed things up quite a bit with each one and just played with all of my "stuff" to come up with different embellishing ideas for each one. I didn't want any 2 to be exactly alike.
So, that's it. My day 3 gift to my kids, as well as my gift to my nail lady and my hairdresser and some of my friends and family too. I hope you enjoyed it.
1 comment:
Great tutorial! And it turned out wonderful!
Post a Comment