Friday, October 29, 2010

Fashionista Friday - 10 Must-have Fall Fashions

First of all I want to apologize to anyone that has found my blog and then been waiting so long for a post for me. The post below has actually taken me a full week to put together. I had to take pictures of each of these things as I wore them and I just did that by wearing something and making my hubby take a picture of me before heading off to work. So, I really do apologize for the lack of posting. I hope to remedy that situation now and then to post more frequently. I've decided, by reading other blogs, that I'm going to have a theme each day. I am not promising to post each day but on the days I do post, each day will have it's own theme. Here is what they will be:

Make-it Monday - posts will be dedicated to things you can make with instructions on how to do it.

Tasty Tuesdays - posts will be dedicated to recipes and food

Wow Wednesdays - posts will be dedicated to things I find that just make me go WOW!

Trash to Treasure Thursdays - posts will be dedicated to projects which take something old and unattractive and turns it into something functional, cute, and beautiful


Fashionista Fridays - posts will be dedicated to fashion advice or finds that I come across.

Saturday and Sunday - posts will be photos of things I've found that I just like, these can be anything at all. If I find something I really like I'll take a picture of it and will post only pictures.

So, without further adieu, here is today's Fashionista Friday post! Enjoy!

I was doing some research recently and found the 10 Must-have fall wardrobe essentials. So, let's take a looksie shall we? I'm going to post a picture of the "must-have" and then my personal version of it. My source for this post is fashion.about.com. What they say I will highlight in red with my comments in black. I often see articles like this and I wonder, how can I make this fit into my wardrobe. So, this post is about that, taking a list of the must-haves and make it fit with what I have. I've included a few of my own must-haves at the end of this post too. These are things I really like this fall and even though some of them may be trendy, I like them and thought I would share. So here goes:

Fall Must-Have Fashion # 1: A Fitted Jacket

A great tailored jacket - - fitted to show off feminine curves, not a baggy masculine style - - will pair with everything from work slacks to jeans. I totally agree! Last year I bought several jackets and really umped my wardrobe up a few notches. Here is their example:
And here is mine: (I look a little frumpy here but hopefully you get the gist of the idea)


Fall Must-Have Fashion #2: White Shirt!

Sounds basic, but a crisp, long sleeve white shirt is a building block for your fall wardrobe. So, I don't know about the rest of you but I really struggle with the crisp white shirt. Oh, don't get me wrong, I love a really white crisp shirt as much as the next girl but I have a really hard time keeping mine crisp and more importantly white! What is your secret to keeping your white shirts so pretty and crisp? Please share because mine turn dingy and gray in no time at all so I must be doing something wrong!
Their example:

And here is mine: Must-Have Fall Fashion #3: Black Pant-suit

Pantsuits may be the ultimate power suit for the working woman, but they also pull their weight after hours when paired with a silky cami and heels. A solid black pantsuit is the most flattering (head-to-toe monochromatic color) and the most classic. Look for a fabric with drape -- nothing too stiff or shiny -- preferably in wool (or wool with some stretch for comfort).

Their example:


OK, I have to admit here I don't have a black pantsuit, not really. I guess this is the one "must-have" that I "must not-have". :)

Fall Must-Have #4: Turtleneck Sweater

Neckline trends come and go -- cowl necks, plunging Vs, henleys -- but a turtleneck sweater has earned its place as a classic. Here's why:

* The turtleneck brings your face into focus.

* A mock turtleneck is a good option if you don't like the buld of a true turtleneck (it's the same height, only the fabric doesn't fold back over) - I tend to like the mock ones best.

* Stick with cozy, touchable materials for your turtleneck sweater because anything itchy or scratchy is unbearable on your sensitve neck area.

Their example:


Mine: Well, I realized I don't really have a turtleneck sweater. I do have some turtleneck shirts though but I mainly wear them under jackets. So, here is one of them but it's worn under a jacket.


Fall Must-Have #5: Neutral Coat
There's a reason timeless fashion pieces retain their popularity: they go with most things in your closet and transcend the trends. The neutral coat -- especialy in a camel color -- is an enduring fall classic because it has so many possibilities.

Their example: While working on this post I'm also planning a trip to New York for New Years so it made me realize I didn't have a good fashionable coat for the cold weather in New York. So, what's a girl to do? Go get one! I got this today! I'm super happy with this coat. Not only is it fashionable but it's 50% wool so hopefully it will be very warm too. And, an added bonus, it was on sale at Old Navy for 50% off. Hurry and get to Old Navy if you need a coat this year. They are on sale and they have some super cute ones!

Fall Fashion Must-Have #6: Plaid

Plaid -- a perennial menswear print favorite -- translates very well to trousers, coats and jackets. Pair with everything from a solid shirt to a twinset. I LOVE plaids!!!! I have lots of examples for this particular item. :)

Their example:


My example:

Fall Must-Have Fashion #7: Tall Boots

Knee-high boots make great sense for fall because they let you get more wear out of everything from skinny jeans to miniskirts. Tuck in slim trousers for a young look or layer on opaque tights with a skirt or dress to keep out the chill. Choose a mid-heel height for the most trend-proof look (something 2 inches or less). Brown boots are a great choice if you wear lots of denim; black pairs with almost everything. OK. I have to say, I love me some boots. I kind of have gone a little nutso on boots this year. I just found so many that I liked and they actually fit around my calves. I tend to have issues with boots around my calves. :( So, yeah, I went a little crazy and ended up buying 4 new pairs of boots this year. But, I wear them all! I love them with skirts, skinny jeans, capris, and even dresses. Boots rock!

Their example:


My example (this is actually a pair of boots I got last year but I wanted ones with heels so I wore these.


Fall Must-Have Fashion #8: Pearls

Feminine pearls are the perfect trend-proof accessory to compliment the more structured styles of fall. Wear gray pearls with black for a sexy tonal look; or choose layers of creamy white pears worn with a simple black sheath dress for a perfect cocktail dress look. I would actually take this a little further and say any type of large beaded necklace is in right now. Not just actual pearls. I love accessories and lately they have some really super cute necklaces out.

Their example:


Mine: The first picture here is a necklace I got from Avon (shameless plug since I sell Avon) but it has lots of different colored beads along with some pearls on a gold chain. The second picture here is another necklace I got at New York and Company. It is a double strand with one strand of mock pearls and a silver chain with gray and black. It also has a bejeweled flower on it. I love this necklace and I've gotten so much use out of it. To me, these are both perfect examples of a wardrobe staple, the pearl necklace. (ps I do have a real set of pearls too which I also believe every girl should have as well!)


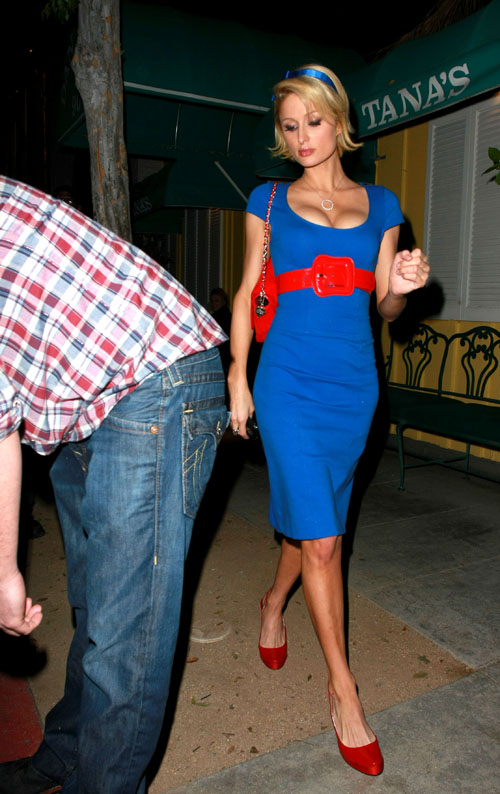
Fall Must-Have Fashion #9: Sheath Dress

Match a sheath with a hem-length coat or wear it on its own with pumps; anyway you wear the classic, knee length sheath dress is a winner. I happen to have several of these and they are right, anywhere you wear it is a winner!
Their example: Mine: I just got this dress from a new favorite website that I must share with you. I'll write more later about it. Suffice it to say this is a Calvin Klein dress priced normally at $159. I got it for $59. I don't know if you can tell or not but it's a red cheetah print in a pointelle fabric. Fall Must-Have Fashion #10: Large Leather Bag

Bags get bigger with cooler weather because you have more to carry (umbrellas, wraps, hats). The leather bag doesn't have to be boring -- there are logoed styles, patent, exotic skins, quilting, bold hardware, bright colors and much more -- but the most classic looks have a ladylike feel to them and understated luxury. Unline an in-today/out-tomorrow "It" bag, the large leather bag will be your faithful friend for years. This is one splurge you'll get lots of mileage on your investment. I couldn't agree more!

Their example:

Mine: This is one of my favorite Coach bags. I got this one at the Coach Outlet last year. I'm willing to bet my bag costs significantly less than the one above. :)


Now to some of my personal favorites for this fall.

My must-have #11: The bootie!

They are super hot, hot, hot this fall. I really like the open toed high heel bootie. I got this pair recently and I really love them. (yep, got them on Rue La La)

My must-have #12: The Cardigan!

While they are not new by any stretch of the imagination, I really love cardigans. They take an outfit from ok to fab!

My must-have #13: The headband!

I've gone a little crazy for headbands too. (hence the post on how to make a headband holder). Here is a picture of my completed headband holder with all my headbands.

Well, I really enjoyed writing this post. It got me to think about my wardrobe and how to really make it work for me. So, of the 10 must-haves, how many do you have? Remember, your "must-have" may be different from these altogether so share that too if that is the case. Let's help each other look fabulous this fall!

As I mentioned above I must share a new website I've found thanks to my wonderful daughter. It's called Rue La La (http://www.ruelala.com/). It is AMAZING! They have designer stuff for a fraction of the cost you would find in stores. And, each day they have a new sale with new designers. They have names such as Valentino, Chanel, and Calvin Klein. Everything is great quality and the prices are to die for. If you want to check it out leave me a comment and send me your email address. It's supposed to be by invitation only and I do get a $10 credit if you sign up under my name and then buy something. So let me know if you want to join the site (it's free to join) and I'll get an invitation sent your way.

I'm all about looking great but I'm also all about saving money. I believe a girl can look fabulous and it doesn't have to cost a fortune. I'm also a designer junkie and I firmly acknowledge that fact. Since I'm not a millionaire and I don't have a rich daddy to supply my every want I've learned a few things along the way. Here are some of my suggestions on how to look great for a little less:

1. Every now and then pick a really good solid piece from a name brand designer and splurge on it. Pick things that are timeless and can be worn for years to come. Don't spend a lot of money on trendy fashions. If you want to look trendy, shop at the knock-off stores or at the non-designer stores. Just remember you get what you pay for. Most of the times you can spend less for something trendy because you won't be wearing it long anyway. However, spend a little extra on those few things that you know you will wear/use for years to come. An example of this is a good pair of boots or a really nice bag. Invest a little more money and you'll be glad you did.

2. Shop the sales and after season clearances. If you find something you just have to have try to wait and see if it will go on sale. Now, this doesn't always work. Sometimes while you wait for something to go on sale, it will sell completely out and you'll be left with nothing to buy. I've had that happen to me a few times. So, if it's something you fall in love with you might have to spend full price to get it. Just make sure you really love it. Otherwise, wait until it goes on sale. If you miss the entire season it's ok...you'll have a nice happy surprise when that season comes around again and you have something brand new to wear that you got last year.

3. Shop the outlet malls if possible. I have a very nice collection of Coach bags. They are wonderful, look great for a very long time, and cost a fraction of what a Coach bag costs at Dillards because I bought them at the Outlet store. Most people will never be able to tell you got it at the Outlet. Only you know that and you can smile and pat yourself on the back that you saved so much money. Another hint on shopping for purses, look for ones with light colored linings. Now you may be thinking "but it'll get so dirty" and you would be right. But, who sees the inside of your purse? You do that's who and a light colored lining makes finding things in your purse so much easier than a dark lining. Have you ever found yourself digging and digging trying to find something and you just can't see it? So, look for light colored linings and all of your stuff is easily seen.

4. When you find a good pair of slacks that fit great, buy them in every color. You'll be so glad you did. A few pairs of pants can be paired with unlimited blouses and jackets for tons of new looks. My suggestions for great fitting pants are New York and Company and Ann Taylor. I love their pants and believe me I buy them in every color when I find some that fit great and look great too. Also, you can often find them on sale at both of those stores. I've bought several pairs of pants at Ann Taylor on end-of-season clearance sales and paid pennies on the dollar for them. Seriously $9.99 for a pair of pants that originally cost $120.00.

So, I hope you enjoyed this Fashionista Friday post. I know it was a long time in the making. I really will try to do better in the future!

Monday, October 18, 2010

Deliciousness!

This weekend was a bit lazy for me. I had a sick dog at home so I spent my entire weekend basically watching my dog to make sure she was going to be ok. What this means is I didn't make it to the grocery store or to Sams like I had full intentions of doing. What this also means is I didn't go out to eat either. So, this post is about "making do with what ya got!" It could also be called "Cleaning out the pantry, fridge, and freezer and making something great." A really good friend of mine went to New Mexico over the weekend and when I found out she was going I hurried an email to her asking her to please pick me up some freshly roasted Hatch green chilis. She agreed and I told everyone I would make us all enchiladas. Well, as soon as I mentioned it I started thinking about them and couldn't stop. Saturday that was all I thought about. Hmmm...green chili enchiladas...hmmm...

I didn't get the chilis until today but I couldn't wait so I decided to make them from what I had. So, here's how I made them along with a couple of other side dishes to go with them. For the enchiladas I had already boiled 2 chicken breasts earlier in the week with the intention of making chicken salad with them. It was only after I boiled them that I realized I had nothing else to go in the chicken salad so they just sat there. I took them out and cut them into small bite size pieces. I looked in my pantry and I had 2 cans of Hatch Green Chili enchilada sauce. OK...they would have to do. I got out an onion (I actually had a couple of them!) and chopped up about half an onion in small pieces. I also got out 4 garlic cloves and chopped them as well. I pulled the very last jalapeno from my jalapeno plant on the back porch, seeded, deveined and chopped it as well. I put a little oil (didn't even have olive oil so I had to use good ole canola) in the skillet and started to saute the onions, jalapeno, and chopped up chicken. I saved the garlic for awhile so it wouldn't get bitter. If you overcook fresh garlic, it just turns bitter and nasty. Once the onions were tender and started to carmelize I added one can of the green chili enchilada sauce. To that I added the garlic, a palm full of cumin, a palm full of smoked paprika, a good pinch of salt, and about a teaspoon of freshly ground black pepper. I simmered it all together for about 10-15 minutes, just to let the flavors all combine and to rehydrate the chicken.

I turned off the heat to the sauce to let it cool to where I could handle it and also so it would thicken...which it did...and heated a smaller skillet filled almost half full with more oil. Once that oil got hot I dipped the corn tortillas in the oil until they started to bubble. It's hard to tell people how long to leave them, but with experience you'll figure it out. You basically just want to get them pliant enough so you can roll them, but not too much so they are tough and hard.

I had some shredded cheddar cheese but if not, just shred some yourself. You need a big 9" x 13" pan. I spray mine with Pam to prevent the enchiladas from sticking and to help make cleanup a lot easier. Then you take one tortilla, add a spoon full of the chicken sauce mixture, spread some cheese over that, then roll it up in the pan. I do all of that in the baking pan actually. I put the loose ends down so it will help hold them in shape. Continue to roll enchiladas. My mixture made 14 of them. Once they are all rolled, top the entire thing with the extra can of enchilada sauce (just straight out of the can). Spread it around so everything is covered. Sprinkle more cheese on the top and bake in a 375 degree oven for about 20-30 minutes until everything is heated, melted, and bubbly.

While the enchiladas were in the oven I made my side dishes. I just made one package of Mexican Style rice in the packet as the directions stated but added some extra cumin and garlic powder. Then I took a can of black beans (for some reason I have like 6 cans of black beans and I'm not sure we even like them!) added a 1/4 of an onion chopped, 2 cloves of garlic chopped, 2 pieces of cooked bacon from breakfast crumbled up and a couple of spoonfuls of sausage from breakfast. I cooked that all together for the time the enchiladas were cooking. Voila! Really quick, really good, really easy Mexican food. Green chili chicken enchiladas with black beans and rice. You can do it too!

On Sunday my dear wonderful husband cooked dinner for me. His dinner was right up there and maybe even better than mine. He made raspberry barbequed lamb chops with black eyed peas and creamy bow tie pasta. I'll get his instructions from him soon and post them. I do know it was so delish! I love when he makes lamb chops. They are my sisters favorite thing he makes and they just might be mine too. He usually uses a combination of apricot preserves and cherry juice (just the juice from the jar of marachino cherries) as his basting sauce but this time we didn't have the apricot preserves. What we did have was left over raspberry preserves from a monte cristo sandwich I had ealier so he substituted that instead. See...make do with what you've got! I also know his pasta was made with a can of Santa Fe Cream of Chicken soup with some extra shredded cheese. Like I said, I'll get his full recipes though soon and try and post them. You won't want to miss them. I have to admit, my man can COOK!

I hope these ideas give you some ideas of your own on how to clean out that pantry and make yourself a really decent dinner at the same time. Until next time, in the words of Julie and Julia...Bon Appetit!

Coming soon...one of my new fall outfits that I just love!

Monday, October 11, 2010

DIY Sunday Projects

Yesterday I decided to get all crafty and do some DIY projects I've been wanting to do. I thought I would share them with you. The first is a headband holder. Lately headbands have gotten very trendy and I love them. They keep this mess I call my hair out of my eyes and out of my face which allows me to keep it long and curly. Well, I've accumulated quite the collection of headbands and they are impossible to store neatly. I decided to do a search on Google to find a headband holder and I came up with an idea all by myself. Well, not really all by myself. I found one idea and then just tweaked it a little. So, here goes:

First of all what you need for this project is:

1 roll of paper towels

1 piece of fabric of your choice. You will need about 1/4 of a yard or they also have these little squares of fabric at Jo-Ann's that will work. They are super cheap too, especially now because they are on sale for 99 cents. Normal price is $1.99 so even if you have to pay full price it isn't that bad.

1 silk flower, preferably a large hydrangea

1 wooden base. I found them at Michaels for $1.99 for a large one which turns out is a little too large for me. I'm going back and get a smaller one and it was only 99 cents

Spray paint to paint the wooden base. You can get cheap spray paint at Wal-Mart for like $1.99 and will have plenty left over. I just used some that I borrowed from my sister.

1 hot glue gun and glue sticks.

That's it for supplies. Total cost: approximately $5.00 - $6.00 depending on your choice of fabric or flowers. Total time involved, approximately 1 hour (but I did seriously burn my thumb on the stupid high temp glue gun and that delayed me a little)

To assemble:

1. Unwrap the plastic from the roll of paper towels but leave the towels in place. You need a full roll, not an empty one.


2. Wrap fabric around the roll of paper towels and put a row of hot glue on one end of the fabric. Fold the other end over so the seam is smooth and glue down to the other side. Leave about 2-3 inches of fabric on either end of the roll of paper towels.


3. Close the ends of the fabric by folding in on itself and glueing as you go. End result will look like this:


4. Put a couple of circles of glue around the top of the roll and put the stem of the flower through the middle roll and glue down. This will be the top of the holder. It's not necessary for the design but it makes it look prettier.


5. Lastly run several circles of glue on the otherside of the roll to attach it to the base. Center it on the base and hold it down for a few seconds to allow the glue to adhere the fabric to the base.


That's it! Now just add your headbands. Here is the final picture with a few of my headbands added. I figured out that I'm going to need 2 of them for all of the headbands I have but I figure they will look good on my vanity on either side of my mirror. Yes, I have that many headbands.


My second DIY project I did yesterday was adding some pizazz and length to a lamp shade. I got this very cool lamp at a garage sale for $1.00. It came without a shade though. So, I went out and bought a shade at Hobby Lobby when they put them on for half price. Unfortunately it wasn't quite long enough and you could see the bottom of the light bulb holder. So, I bought some trim and hot glued the trim to the bottom of the shade. It made it match my decor even more and also hid the light bulb holder. This project was not all that cheap because the trim I picked out was quite pricey. However, with the price of the lamp being so cheap and the shade on half price, the total price of the entire lamp was still under $40. The trim was $12.99 a yard and I got 2 yards. I used about a yard and a half of it so I could have probably gotten away with just 1.5 yards but I wanted to make sure I had enough. Here is the final project:


And here is the total vignette where I have this lamp. I love this! It's in my entry way.

I hope this inspired you to try and make some things for yourself. Not only does it save you money but it's fun as well!

Friday, October 8, 2010

Tootsies

As the seasons are changing I find myself struggling with deciding what to wear each day. I guess I've discovered that my wardrobe consists of 2 seasons of clothing...summer and winter. I don't seem to have very many in-between things. My winter stuff is all heavy, wool, long sleeved, and way too hot to wear in 80 degree afternoons. My summer stuff is all light, breezy, summery...and way too cold to wear on those 50 degree mornings. Not only that but I've also discovered that apparently my very obvious and often lamented shoe fetish seems to be concentrated on summer type shoes. I really don't have very many close toed shoes. I have quite a few pair of boots, some of which are actually new for this year but I feel awkward and out of place wearing boots in 80 degrees. So, what is a girl to do? I could go out and go hog wild buying tons of new shoes, of which I have no place to store, or I could somehow make do with what I have.


This brings me to today's post. I did some research last night to find out what the "experts" say about the subject of today's blog. Is it ok to wear tights with open toed shoes? Unless you've been living under a rock you have to have noticed that tights have made a come back. No longer do they exist only in pictures from the 70's, no ma'am. They are back with a vengeance. But, is it ok to wear them with open toed shoes? Here is what I found:


First of all, nude hose are so passe. I didn't find a single article that thought they were ok anymore. So, for all of you out there with a firm supply of panty hose, you might want to rethink wearing them. Apparently it is not ok anymore. Most everything I read said to just go bare legged rather than wearing the dreaded nude pantyhose. However, tights are a different story. They are definitely in the "it's hot" category. But, can you wear them with open toed shoes? The answer (according to many sources as well as myself) is YES! You can wear your cute opaque tights with open toed shoes. There are some guidelines though so pay attention.


First of all, the tights need to be opaque, meaning not sheer and you can't see your legs through them. This will prevent some people from taking some pantyhose that are black and claiming them as tights and then breaking the above rule of no more pantyhose. If in doubt, stretch them out on your hand, can you see your skin? You should not be able to.


Second, patterns are a yes. However, the pattern colors must be muted. Don't go for a bright fuschia and black plaid for example. However a nice muted gray and black plaid is very cute.


Third, do not mix different color tights. For example, do not have one pink leg and one yellow leg. This just makes you look like a clown. No, really...Don't do it!


So, as for the shoes. I actually found it was ok to wear the tights with open toed shoes. There are some gotcha's on it though. You can't wear tights with some cute strappy sandals. Oh honey no...that would just look horrible. You can wear them with a peep toe shoe though or even a sandal if, and only if, the sandal is chunky with wide straps and a big heel. Here are some cute examples of what is ok:


I love this outfit, tights, shoes, purse, dress...it all rocks!


Now I'm not overly fond of these tights but I have to admit, they are still cute with these shoes and this is totally ok.

Now on to an "oh honey no" example:

Please, Please, Please, do not EVER wear this:


Unless you want to look like those little old ladies in church that really just don't know any better, this is a horrible look. Can you see the difference between this and the 2 above? The difference is in the shoe. Chunky peep toe shoes are dang cute with tights. Strappy (say it isn't so WHITE) sandals are so not ok with black tights. Let's just go ahead and put those strappy white sandals in the closet until after Easter shall we?

Until next time, this is just another "the world according to me" post. Feel free to argue, complain, agree, or disagree down there in the comments.

Have a great Friday!

Thursday, October 7, 2010

A Gift Idea

For those that don't know this I'm seriously addicted to scrapbooking and stamping. Stamping as in rubber stamps with ink, not as in postage stamps. I'm in a monthly club with some pretty wonderful ladies. We meet once a month at our fabulous leaders house and do some sort of project together. It's a great opportunity to get out and visit with other like minded women and also to make something cool. Each month we take turns being the "hostess" of the month. The person who's turn it is that month is responsible for bringing snacks of some sort for all of us to share. Well this month it was one of our standing long-term members turn. She really outdid herself. She brought chicken salad with croissants, chips, and then the most delicious pecans. OK, I'll admit it I had 3, yes count them THREE sandwiches. But really each time I went back for another sandwich I had an ulterior motive to grab more of those delicious pecans. I asked her where she got them and she said she made them herself. Well, she didn't actually MAKE the pecans, but she dressed them up a little and she did actually grow the pecans herself. I've decided I'm going to make them myself and use them as gifts this year for Christmas for coworkers and friends. I'm going to get some of those cellophane baggies and make some cute ties with tags that also serve as a coaster and then fill up the bag with these delicious yummy pecans. So, I thought I would share the recipe and idea for those of you out there looking for some sort of something to make for your friends and coworkers for Christmas. I don't think Mrs. W will mind me sharing her recipe for the pecans either. She was quite willing to share it. Now, in general before I post any type of recipe or anything here I will usually have made it myself to make sure it's just as good as I'm claiming, but in this case I have not actually made these pecans yet. I have, however, sampled quite a few of them and I can attest they are divine! So, without further adieu, here is the recipe for "Spiced Pecans"...Enjoy!

Spiced Pecans from Mrs. W. in my Stamp Club
2 cups sugar
2 teaspoons cinnamon
1 teaspoon nutmeg
1/2 teaspoon ground cloves
1/4 teaspoon salt
4 cups pecan halves
(I put my pecans in a very large bowl, then pour the mixture over them)
* Combine sugar, cinnamon, nutmeg, cloves, 1/2 cup water and 1/4 teaspoon salt
* Mix well, cover with wax paper and microwave on HIGH for 4 minutes
* Stir and microwave another 4 minutes
* Add pecans, quickly mix well and spread on wax paper to cool
* Break apart and store in a covered container

Tuesday, October 5, 2010

A Fall/Winter Staple

As the weather starts to cool down and the temps dip down into the 40's and 50's I start to crave some of my favorite Fall/Winter foods. At the top of this list is Hot Rod and My Potato Soup. Pretty much anyone that has ever tried it just raves about it and wants the recipe so for all of you out there (all 2 so far!) here it is. Whenever you just need a pick me up or you just need some warming up from the inside out, try this soup. It goes great with corn bread, dinner rolls, Pillsbury Crescent Rolls, or heck even crackers!

Hot Rod and BikerCandy's Potato Soup
Potatoes (the amount depends on how much you want to make, but the general rule of thumb is 1 medium to large potato for every 2 bowls of soup you want).
Corn - either 1 can, or 1 small bag of frozen, or 2-3 fresh corn on the cob with the corn cut off
Green Chilies - I use the frozen kind that is already chopped up, but you can use the canned as well, just get the diced kind. Use about one small can or half of the tub of the frozen kind.
Chicken - 2-3 chicken breasts cut into bite size pieces. (this if for a large batch ~ 10-12 bowls, reduce to 1 breast for smaller amounts)
Butter - 1/2 to 1 stick (depending on how much you are making)
Olive Oil - about 1-3 Tablespoons
Onion - 1/2 to 1 onion chopped (again depending on how much you are making)
Milk - about 1/2 to 1 cup
Salt and Pepper
Garlic - 2-3 fresh cloves chopped fine
Cayenne Pepper - a good dash (probably about a teaspoon)
Grill Seasoning - your favorite brand - we use Canadian Grill Seasoning - about 2 teaspoons
Shredded Cheddar Cheese - optional
Sour Cream - optional
Peel potatoes and cut into small bite size chunks. Put potatoes in a large pot and cover with water. Don't worry about the amount of water at this point. Just put enough water like you are making mashed potatoes. Boil potatoes until fork tender. While potatoes are cooking in a separate skillet, melt butter with the olive oil. Add the onions, green chilies, chicken, grill seasoning, and garlic. Saute until onions are translucent and chicken is cooked through. Drain some of the water off of the potatoes until you are left with the potatoes and just enough water that they are covered completely. Add the mixture from the skillet to the potatoes and stir well. Don't drain off the oil and butter...this is what makes the soup so good! Add the corn, cayenne pepper, and salt and pepper to taste. Stir well. Add enough milk to make the soup white with the consistency you desire. (I prefer more of a stew consistency but if you like your soup thinner add more milk). Stir again. Bring to a boil. Reduce heat and simmer to allow the flavors to mesh together. If the soup is the consistency you desire, cover the pan. If it's a little thin leave it uncovered to reduce the amount of liquid. Simmer for anywhere from 20 minutes to an hour stirring occasionally. To serve, ladle the soup into bowls and sprinkle shredded cheese on the top. You can also add a dollop of sour cream to the soup as well. (I'm not a fan of sour cream so I never do this but for those that do like it they say it is awesome with it.) ENJOY!

Monday, October 4, 2010

A Fresh New Blog

Well, here it is, a fresh new blog. This blog is totally different from any previous endeavor I've undertaken in the realm of blogs. This blog is going to be about 3 of my passions: Food, Fashion, and Design. So, this is not necessarily going to be me trying to be funny, or me bitching about my everyday life. No sirree. This here blog is going to be about me sharing new ideas, new recipes, new fashion tips, new decorating ideas, and just in general new things that I find that I really like. So, with that, here goes:


Speaking of fashion...I was watching Project Runway the other day and Heidi Klum said something that after much consideration I've decided I just don't agree with. One of the designers created this very cute outfit with a kind of goldish, yellow piping. Then the designer paired the outfit with some goldish, yellow shoes. Heidi criticized the outfit saying (and I quote here) "that's just too matchy matchy and that's not where it's at now." OK...well maybe she didn't say those EXACT words but pretty much that sums up what she said. After she said that I really started to think about it. What is so wrong about "matchy matchy"? Personally I've always really strived to go for the matched look. I think you look more put together and more stylish if you really do try to match something in your outfit with your shoes. Now, there are exceptions to this rule. Such as: a totally black and white outfit rocks out with some bright red shoes, or a hot pink dress looks fab with some black patent leather pumps. But, in general, I prefer to match. Does this mean I'm no longer the fashionista that I've self proclaimed myself to be? Say it isn't so.


Well, being the investigative reporter that I am I decided to do a little research. (Don't you just love Google?). Well, the Urban Dictionary defines "matchy matchy" as: Often used in fashion blogs (ya think?). Used to describe an outfit that is too coordinated and consists of too many of the same types of colours, patterns, fabrics, accessories, designer pieces, thematic elements, etc. Can also be used in reference to interior design. Google also has a plethora of pictures dedicated to illustrate exactly what matchy matchy looks like. However, many of these pictures I find cute. Exhibit A:

Now I'm not a Paris Hilton fan, don't get me wrong there, but personally I find this outfit incredibly cute. I like the red belt, purse, and shoes. I like the contrast with the blue and I don't find the outfit "wrong" in any way. Well, of course except the obvious thing of it is Paris Hilton wearing it. But really? This was shown as an example of what not to do.


Next exhibit B:

Now this I do consider just a tad too much matching. There should be more than one color. So, in this case I do think they are right, this is a bit too much matching. However, on the other hand, this girl is really rocking this outfit. She looks polished, put together and confident. So, even though the outfit is a bit too much "matchy matchy", she pulls it off because of her self confidence.

So, after exhaustive research I've decided two things. The fashion world may be a little off on this one. Matchy Matchy is ok, as long as it isn't the entire outfit. Matching your shoes with another accessory can totally rock! Sorry Heidi, you got it wrong this time. Second, it really doesn't matter what anyone else thinks or says, if you feel pretty you can rock anything. Self confidence is where it's at baby!

This is another "the world according to me" post. Feel free to argue, agree, or just express any opinion you would like here in the comments.

Until next time, remember fashion is a reflection of yourself. Don't be frumpy!